The Assembly
On to the actually-required steps on building the kit at last. To be frank, this is my slowest record of building Gunpla.2 month to work on a HG kit? You got too much time man~
The Parts & It's Assemblies:
Start off with the Upper body/Abs, as per manual of course. All parts excluded the polycaps.
Yes, MY foil sticker are better than that Bandai given.Ha.
All assembled. Initially I plan to topcoat this kit first, explaining the separated clear part. But my easy going/lazy self just can't bring up the plan...
So I trim diagonally cut the pegs connecting the chest armor for ease of removal for top coating...once I regain some compassion for such plan.
Parts for the Waist/lower body.
Only here I realized parts to cover the action base hard point is supposedly grey. So grab the marker and contour the appearance.
The completed waist. Unlike conventional kit, this ones didn't have any waist rotation. Instead it have 'middle chest' rotation. It still give the same effect plus tilts & bends to the body. Nice~
Parts for the Leg. Got most number of parts, which is always welcomed for a HG kit.^^,
Left & right Thigh. Way-to-obvious seamlines here...sob. Like the multiple hip joint incorporated here; sideway swivel for the thigh + ball joint for the pelvis.
Left & right calf. Fewer parts than the thighs, yet can hide it seamlines like a pro. The protruding peg as seen at the right calf is literally the bones that connecting the thigh and the foot.
The feet. Single ball joint....& pretty much color/anime accurate.Ha.
Articulation test, forward & backward movement.
The sideways. Though the ankle guard in not touching the foot, it movement is limited by the ankle joint itself. So much of some 'calf bone' -_-|||
Parts for the Arms/shoulders. That long pegs remind me of that articulately-limited Seed HG, sigh...
Assembled vs To-be-assembled. That's the far the bends can go. Though this limitation is somehow 'compensated' with the multi-swivel-arm joint, which still not changing the overall articulation. Almost forget, the shoulder armor can be lifted & tilted upward.
Parts for the Thrusters/GN Drive-Tau.
Assembled. This parts gain its articulation from polycaps ball joint. Simple & sturdy.
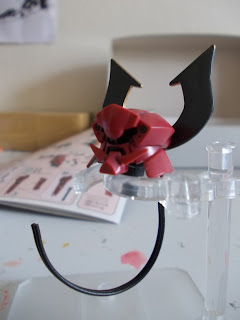
At last, the Head itself~
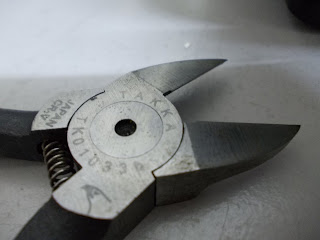
To liven up the fearsome facial of this suit, any blunt 'fin' is an absurd. So I took the liberty with my fellow snippers to sharpen it up.
A round of applause to this awesome flat cutters~\(^o^)/
Also, sanded off portion of the inward edges of the front head parts. First saw this technique from Dengeki Hobby magazine. It somehow give the Zeon's suits sense of mass & weight (to me), which were done thoroughly unlike mine.
Fully assembled, only wait for GN particles to light up it eyes~XD
Plan to top coat first, then apply the eyes sticker.Yes....'plan to'....
Fully Assembly:
Front shot. Fully equipped with its armaments done in previous review.
Rear shot.
Finally, a finished kit....Well, after all of this 'parts' of review, I finally coming to the actual Review of this kit. Full action of this kit + 'extra' in next review~


No comments:
Post a Comment